
So, why are we (all) here?
If you’re fully aware and just want the fix, you can skip ahead. This is all down to this thread started by blueJoffles on the /r/AMG subreddit. For the rest of you… well, I was doing a power steering fluid and reservoir replacement on the C63. The reservoir contains a filter which eventually gets clogged so the power steering pump ends up being fluid starved, suffering cavitation, and making a lot of unpleasant noise as a result. The reservoir is a service item and the job is pretty straightforward.
It should be a straighforward job, so long as nothing else goes awry along the way. All the YouTubres seem to have managed to complete the task without much of a hitch, other than needing a second litre of fluid, and I’ve got that covered from the get go.
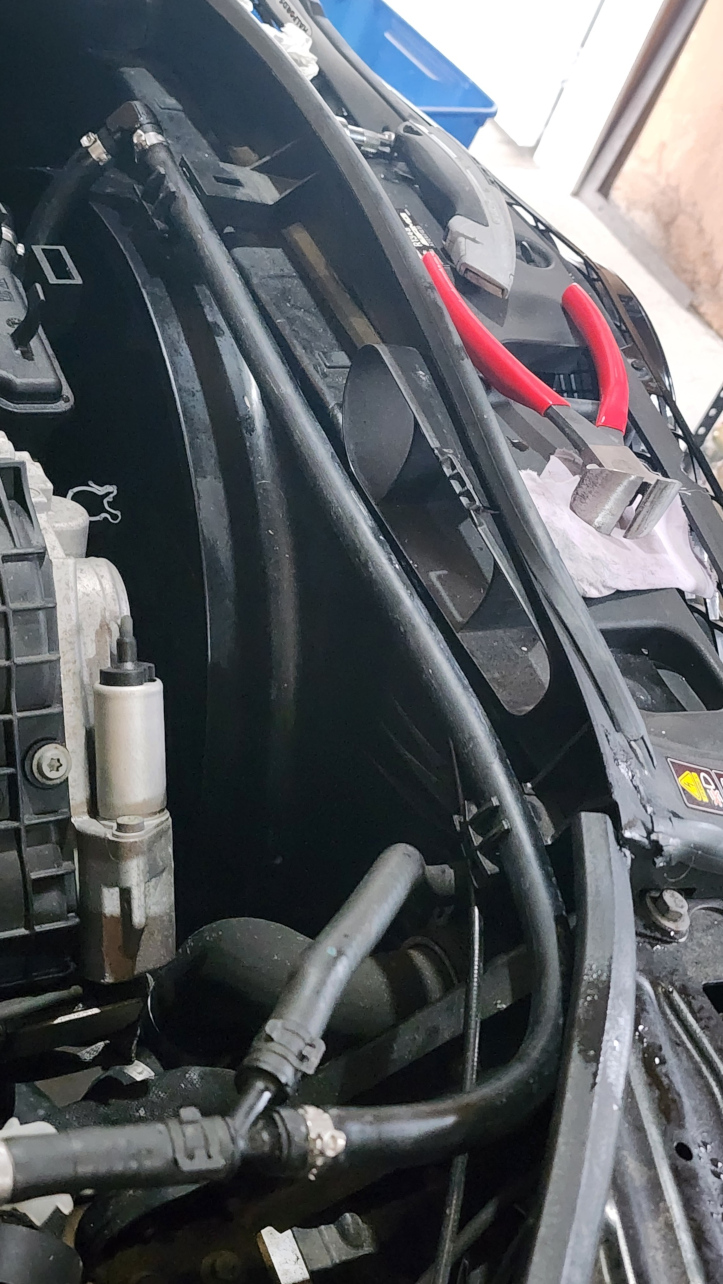
Reattaching the return hose resulted in a little fluid spill when removing the temporary plug from the reservoir port. Nothing I’d not seen on YouTube, and certainly nothing of consequence on the auxilliary belt (phew). Easy to mop up once I got my arm down in amongst the engine, hoses, and fan housing. A bit of a squeeze, bit of a scratch, no harm done?
Fire it up to see how things are, and we seem to have been successful. The unpleasant noise has completely gone, and the steering is all good. Final check before a test drive, and why’s there coolant on the garage floor? Hmm. Test drive went great, all fixed. Back home and more coolant outside the engine, running off the undertrays.
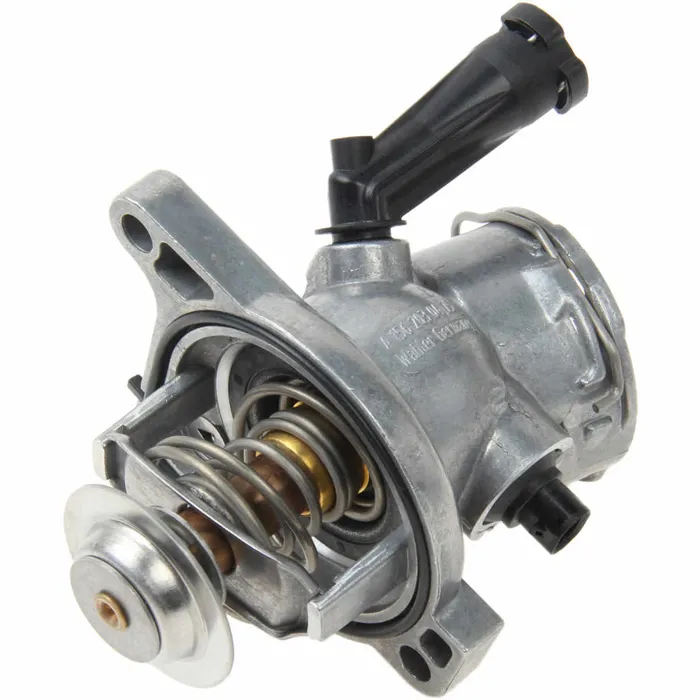
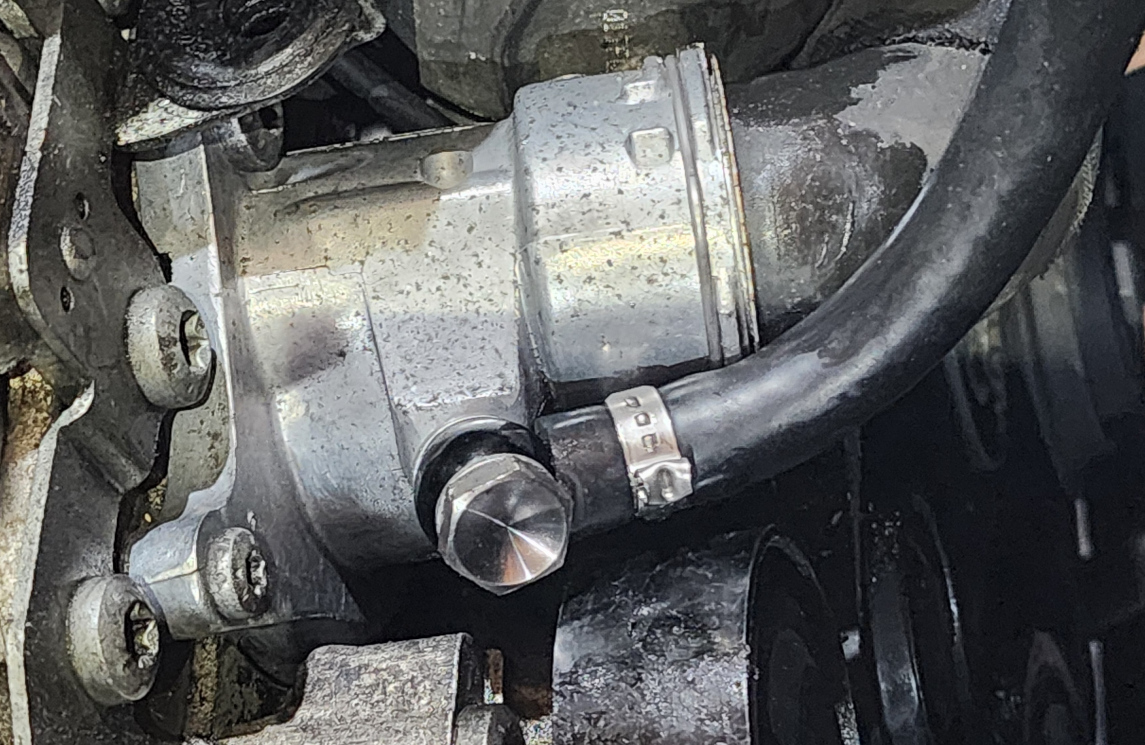
Turns out that black swan neck at the top of the thermostat housing (in the image above), had almost completley snapped off right where it disappears into the alloy casting. As soon as I touched it, of course, it finished the job and the coolant now returned to the undertray instead of the coolant header tank. I think a word like ‘b*stard’ might have been used. Going through the sequence of events, pushing my big arm down between the fan housing and the coolant return hose had caused the hose to push on and twist the swan neck. As much as materials science has advanced, plastics still don’t have the durability in the harsh environment of an engine bay that metals do. B*gger was the next word on the list.
And, so, here we are standing in a puddle of coolant with a slightly awkward hole in the engine.
What are the options?
Well, you could buy a whole new thermostat housing from your preferred Mercedes Benz dealer (€250) or a third-party supplier (€135) and be up and running again in an hour. Well, until the plastic gets brittle with the heat and fails again.
Thankfully, after a whole bunch of searching, I found blueJoffles’ subreddit. That was the existence proof that you don’t need a whole new thermostat housing. There are a few approaches prople have found on that thread, and I’m not here to say any one or other is better – it’s horses for courses. The other solutions I’ve seen all re-tep the port on the housing. I haven’t seen any other solutions that use the thread already in the casting, which is the approch I’ve taken.
How to
This is why most people are here, I expect. This how to is put together from my own experience, on my own engine, informed by reading on various forums. It is not a workshop manual, nor does it come with any recommendation or guarantee of success. Your Mileage May Vary and you’re responsible for what you do, but, that said, this worked well for me. So best of luck and, if you do try this or a similar modification, please drop a comment on this post about what you did and how well it worked.
Parts
That hardest part to find was a banjo bolt with the right thread. The housing has a fine M12 thread with a 1.0mm pitch. The only suitable banjo bolt I could find is made by Aeroflow, part number AF315-04. The rest of the bits were more common.
- M12 x 1.0mm / 30mm stainless steel banjo bolt
- M12 alloy crush washer (2 off)
- 12mm banjo to 8mm (5/16″) barb
- 90° barb to barb 8mm (5/16″) hose joiner
- Coolant hose to fit 8mm (5/16″) fittings
- Hose clamps (at least 4 off)
Specs
The only specs I’ve got are for the retaining bolts on the thermostat housing
- T30 – 8.5 Nm
- T45 – 30 Nm
Looking around at comparable sump plug torques, a sensible value for the banjo bolt seemed to be around 25 Nm. It went to 20 Nm pretty comfortably so I tried 22 Nm and wasn’t happy with how it felt. So, this bit is definitely up to you, but I’d be reluctant to go above 20 Nm if that is enough to seal the join.
Method
Although it’s a pretty easy job, I hadn’t seen a step-by-step how to anywhere so that was the motivation for this.

Once the PAS reservoir is out of the way, there’s reasonably good access to the bolts retaining the housing. Having the swan neck out of the way makes it a lot easier to get a socket in to the top left bolt.
The top right bolt is a T45, the other two are T30. With the socket shown, a 75mm extension was perfect.
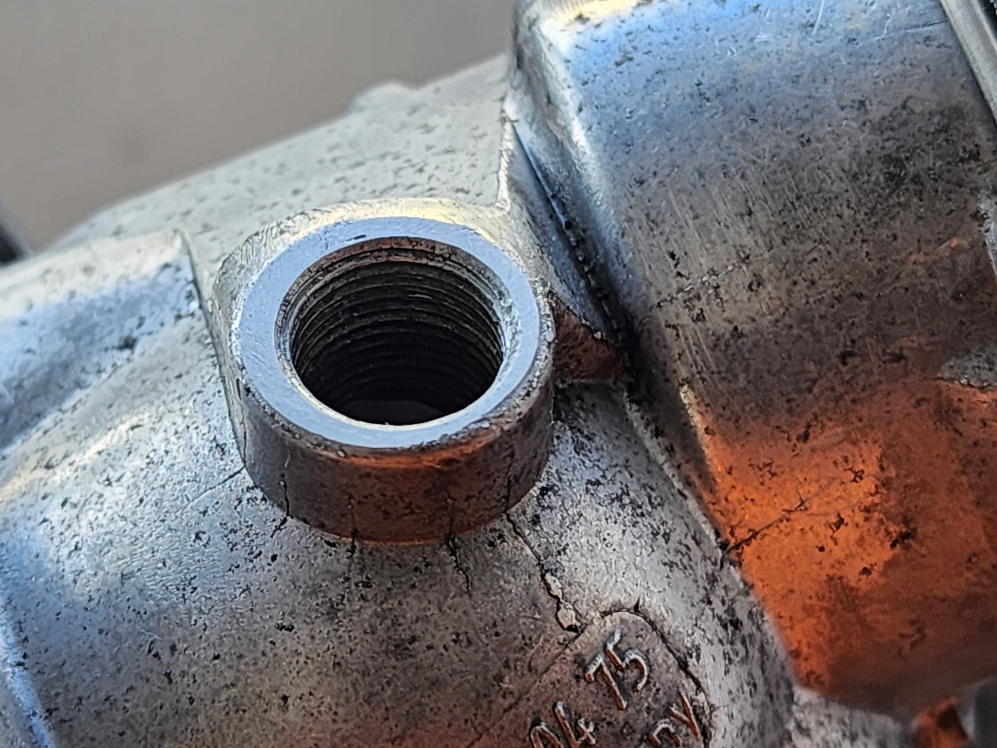
A couple of things to do once the housing is separated from the block. First, clean the threads thoroughly to remove the plastic and any residue of factory thread sealant. Chasing using the new M12x1.0 bolt with some WD40 works well, or a tap if you have it. Second, use an appropriate flat abrasive to rub down the surface of the thread boss to create a smooth flat surface for the crush washer to seal onto.
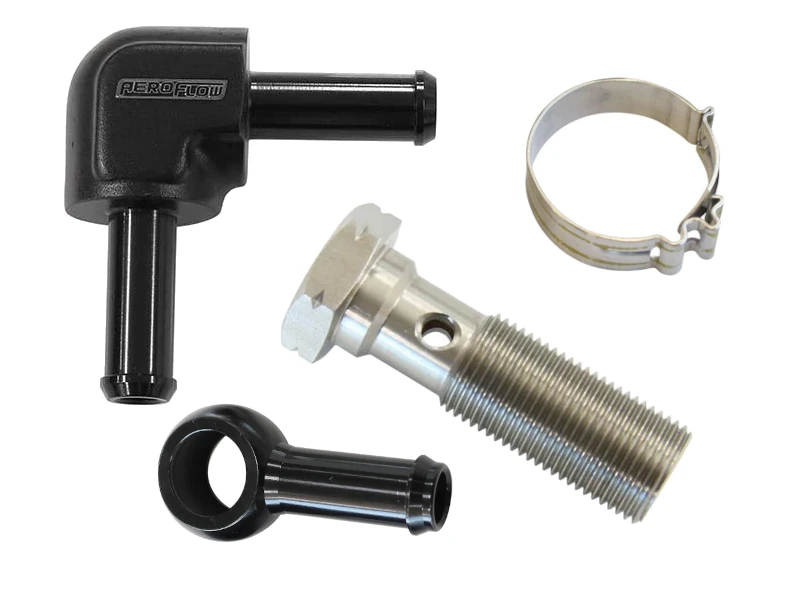
I managed to get all the fittings from a local retailer, although the banjo bolt was hard to source with an M12 x 1.0 thread as most M12’s seem to be 1.25 pitch.
- M12x1.0 30mm stainless banjo bolt
- 12mm banjo to 8mm (5/16″) barb
- 90 degree 8mm (5/16″) barb
- Suitable Oetiker clamps
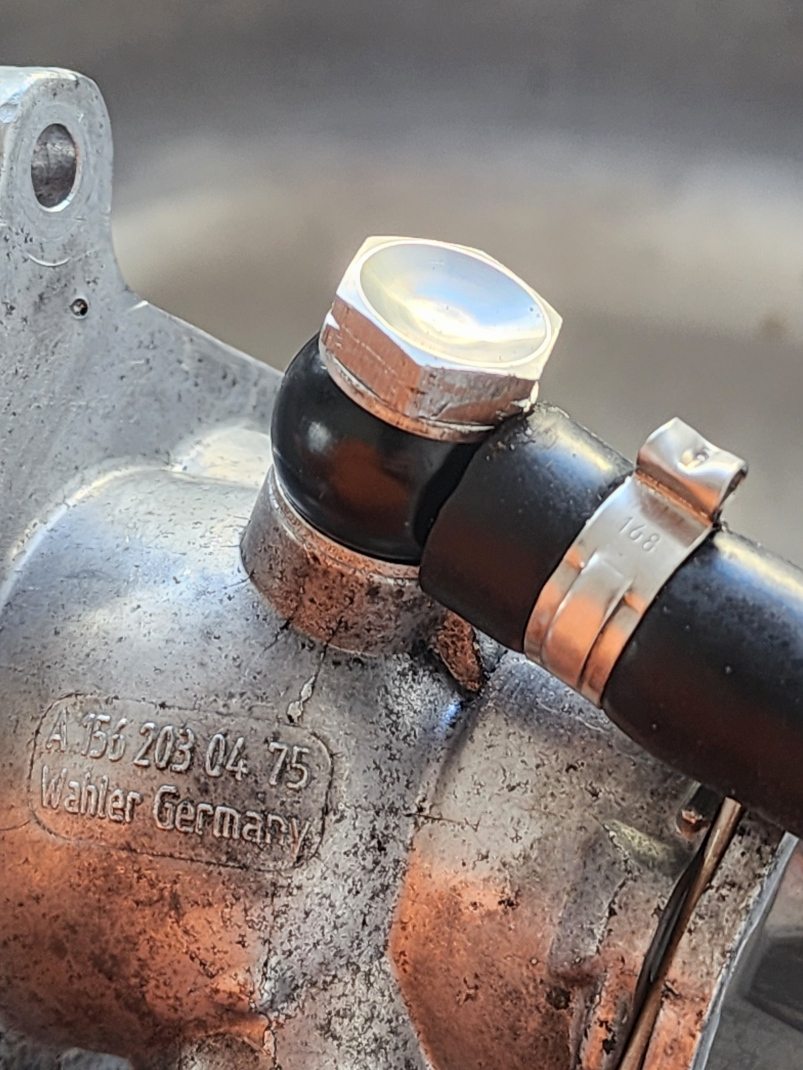
With the addition of a couple of alloy crush washers and a 200mm section of coolant hose, I could test fit everything. With the additional padding from the crush washers, the bolt was the perfect length to engage all the thread without fouling the temperature sensor housing.
Once everything is buttoned back up, it’s pretty tight in there between the auxiliary belt pulley and the base of the PAS reservoir. I made sure to maintain spacing to the pulley by keeping a spacer in the gap between the pulley and hose whilst tightening and torquing the banjo bolt.
The housing went back onto the engine sans banjo to make torquing the retaining bolt easier. Then the banjo went on with the crush washers. Using a spacer really helped keep the hose in the right place and avoid any snagging issues with the pulley (since it’s righty tighty).
You should really put a new seal in the housing, after giving both surfaces a good clean. It’s not expensive, but… Mercedes NZ didn’t have it in stock and it would be 5 weeks to come from Malaysia. There’s no reliable part number, so you’ll probably need to talk to a specialist independent to find it.
The other bit that’s tight is the clearance between the return hose from the banjo and the quick fitting for the main thermostat hose. Because of needing to keep the hose between the aux pulley and the PAS reservoir, it has to pass across the quick fitting spring. The banjo I got is straight, so the hose presses on the spring. It only makes it a little tight going in, but almost certainly means the banjo will have to come off to release the main hose. That shouldn’t be any biggie though. If the main hose is coming off, you’re not going to be worried about losing coolant when you remove the banjo or take the thermostat housing off! If you can find a banjo with a bend in it, that might give enough clearance – it doesn’t need a lot.
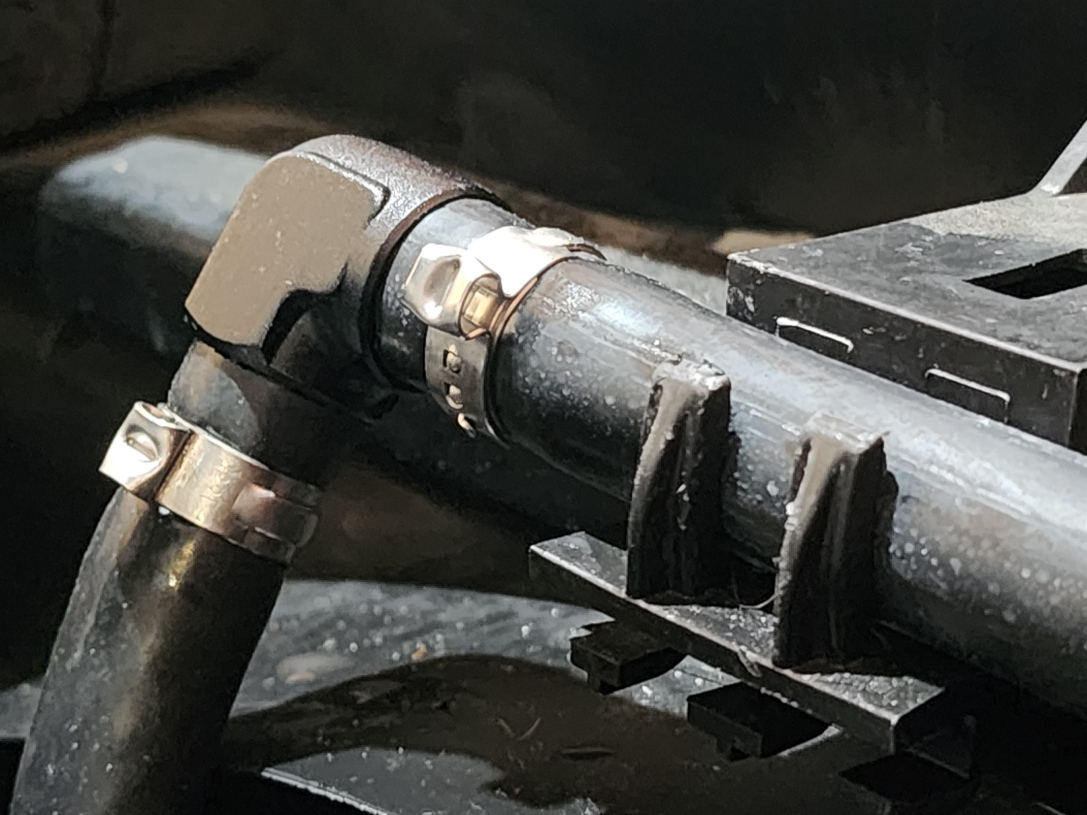
The final piece of the puzzle is to connect the riser hose from the thermostat back to the coolant header tank. The original hose runs close to the block and is held by a clip on the PAS reservoir. With the different goemetry of the banjo fitting, it was more natural for the hose to come up to the top centre of the fan housing.
There’s a hose clip on the top of the fan cowl, at least on my C63, which is perfect. Replacing the stock hose with the slightly longer straight run, and adding a 90o barb fitting worked a treat.
All done. The new hose run uses the first clip of the standard route, then round over the fan cowl. Through the elbow and then the final ~200mm of hose to the banjo.
So, there we have it. Drop a comment if this has been helpful or if you have any thoughts, like how to do it better.